LED flicker on video cameras is a subject that has been coming up a lot recently in my office. The major question is "is this flicker free?" Below I have outlined three popular methods of dimming LEDs and their affect on video cameras.
Constant Current Reduction (CCR)
In this scenario, Direct Current (DC) is being applied to the LEDs. The current is controlled so that a reduction will lower the output of the LEDs. There is no rapid switching of the current here, rather it is being throttled down by the driver. The camera will only see the difference in intensity, and will not flicker as the LEDs are constantly on, just at a lower current.
Pulse Width Modulation (PWM)
Unlike CCR, PWM switches the current being sent to the LED on and off at a frequency depending on the dimming level. This way, it appears to the eye to be dimmer by being switched on and off at a fast rate. The downside to this is that if the cycle is similar to the frame rate of the camera, flickering will occur.
0-10v Dimming (0-10v)
As long as the power coming to the LEDs from the driver is DC, there should be no issue with flickering. The factor here is the current type, Alternating Current (AC) fluctuates the current in a sine wave, where as DC has an output of a steady current. The camera will see the current fluctuating in the AC powered LEDs. Please note that I am referring to the current that is in between the driver and LEDs, not the power coming into the driver.
Wednesday, February 11, 2015
Thursday, July 17, 2014
Dimming Technologies for Fluorescent Ballasts
It seems like I'm on a roll with the dimming, so I figured I would delve into the different fluorescent dimming ballast technologies. Dimming fluorescent fixtures was a great option when LED first came on the market. Fluorescent is the popular "Value Engineered" option when an end user was faced with the quote for an LED package. Fluorescent in some cases can dim just as well as LED, and can save energy when dimmed. Although it cannot match those LEDs that can dim to 5 or 0%. LEDs have dropped in price over the past few years, and the main problem with dimming fluorescent is that the dimming ballast is expensive. Many LED fixtures that have dimming already included are around the same price point, consume less energy, and do not need regular maintenance for lamp replacements. These are considerations that need to be made when designing a job to meet a specific budget.
Fluorescent Dimming Ballast Technologies
2 Wire Fluorescent
Requires a dimmed hot, and a neutral. The hot is dimmed with a forward phase dimmer.
3 Wire Fluorescent
Requires a dimmed hot, a switched hot, and a neutral. The hot is dimmed with a forward phase dimmer, but the power for the fixture is controlled by the switched hot.
4 Wire Fluorescent (0-10v)
Requires a non-dim hot, a neutral, and two low voltage inputs that receive a 0-10v signal. The power for the fixture is controlled via the non-dim hot. Many 0-10v drivers can not dim to 0%, and will be turned off via the non-dim hot to get to 0%. (See my post about LED dimming technology for more on the 0-10v technology).
Monday, June 30, 2014
LED Dimming Technology
Since LED lighting has become popular, one of the most common topics that I am asked about on a daily basis is dimming. What used to be a fairly straight forward proposition dimming incandescent fixtures has been made more complicated by the fact that the new LED technology is very finicky about how it is dimmed.

The dimming methods that I see used the most with LEDs are reverse phase dimming (Electronic Low Voltage, or ELV), forward phase dimming (Magnetic Low Voltage, or MLV), and 0-10v.
Reverse phase dimming
In reverse phase dimming, each power line cycle is only energized for the initial part of the sine wave.
Forward phase dimming
In forward phase dimming, each power line cycle is only energized for the trailing part of the sine wave.
0-10 volt dimming.
In this method, the LED driver is monitoring for a control signal that ranges between 0 and 10 volts. 10 volts will usually be 0% dimming, or off. 0 volts will usually be 100% or full brightness. This is so that in the event of a failure on the device sending the signal, the light defaults to fully on.
Advantages / Disadvantages
Reverse Phase
The advantaged to reverse phase are that it is designed as a semiconductor rather than a transistor, which allows it to be more efficient and can have a higher load to dim. By controlling the off cycle of the sine wave, it reduces dimming "hum or buzz" like the forward phase can, but without the need of a choke.
A disadvantage to the technology that reverse phase uses, is that it can produce a lot of heat from controlling the dimming of the sine wave.
Forward Phase
The advantages here are that forward phase is budget friendly, it is common, and has high quality chokes that will produce less dimming "hum or buzz."
One disadvantage is that while the hum or buzz should be quieter, it still may be present, which is a downfall of the technology. Also, it may not perform well with electronic ballasts or dimmers due to the distorted nature of the waveform generated. This can damage or destroy equipment that is not designed to work with this technology.
0-10v
The advantages to 0-10v dimming are that you can run the signal wire fairly long distances, and that for the most part, drivers are universally compatible with the 0-10v signal. You can also mix lamp types, you can run 0-10v fluorescent and LED on the same signal.
The disadvantages are that over a long distance, the 0-10v signal suffers voltage drop, meaning that if your last fixture on the run is only receiving 8 volts, it will only come up to 80% where other lights are at 100%. The other disadvantage is that there are still electricians who are unfamiliar with the technology and do not understand that they have to pull the additional control signal wire to each fixture. This can be a problem if the job has been sheet rocked before they install the dimmer to test it.
Friday, June 27, 2014
Down Lights or Wall Washers?
When lighting a room using down lights, you must consider how you intend to handle light on the vertical surface of the walls. A down light will direct light straight down, and a wall washer will ideally graze the wall from ceiling to floor. While this may be an obvious statement, the wall washer is often forgotten or misunderstood when it comes to lighting a room. If down lights are needed near the wall, depending on the situation, utilizing a wall washer is an effective tool to eliminate the "cave" and "scalloping" effects that down lighting can provide when grazing a wall. One mistake that is made with down lights in regards to walls is the idea that mounting the light closer to the wall will more effectively wash the wall. This practice will result in a hot (bright) spot on the wall close to the ceiling, and not eliminate the scallop.
By using a combination of wall washers around the perimeter of the room, and down lights in the center, a room can be lit without odd scalloping on the walls. Some may argue that scalloping the wall with even spacing of fixtures can create a visual interest, it can also be argued that this is actually taking away from design elements in the room by the interior designer, architect, or end user.
One application that uses wall washers often is video conference rooms. Cameras can exaggerate lighting conditions to appear either under or over lit. By providing an evenly lit wall, the camera will not be confused as to which lighting level it should adjust its levels. Also the background for the subject will not be dark, creating a more natural look for the video call.
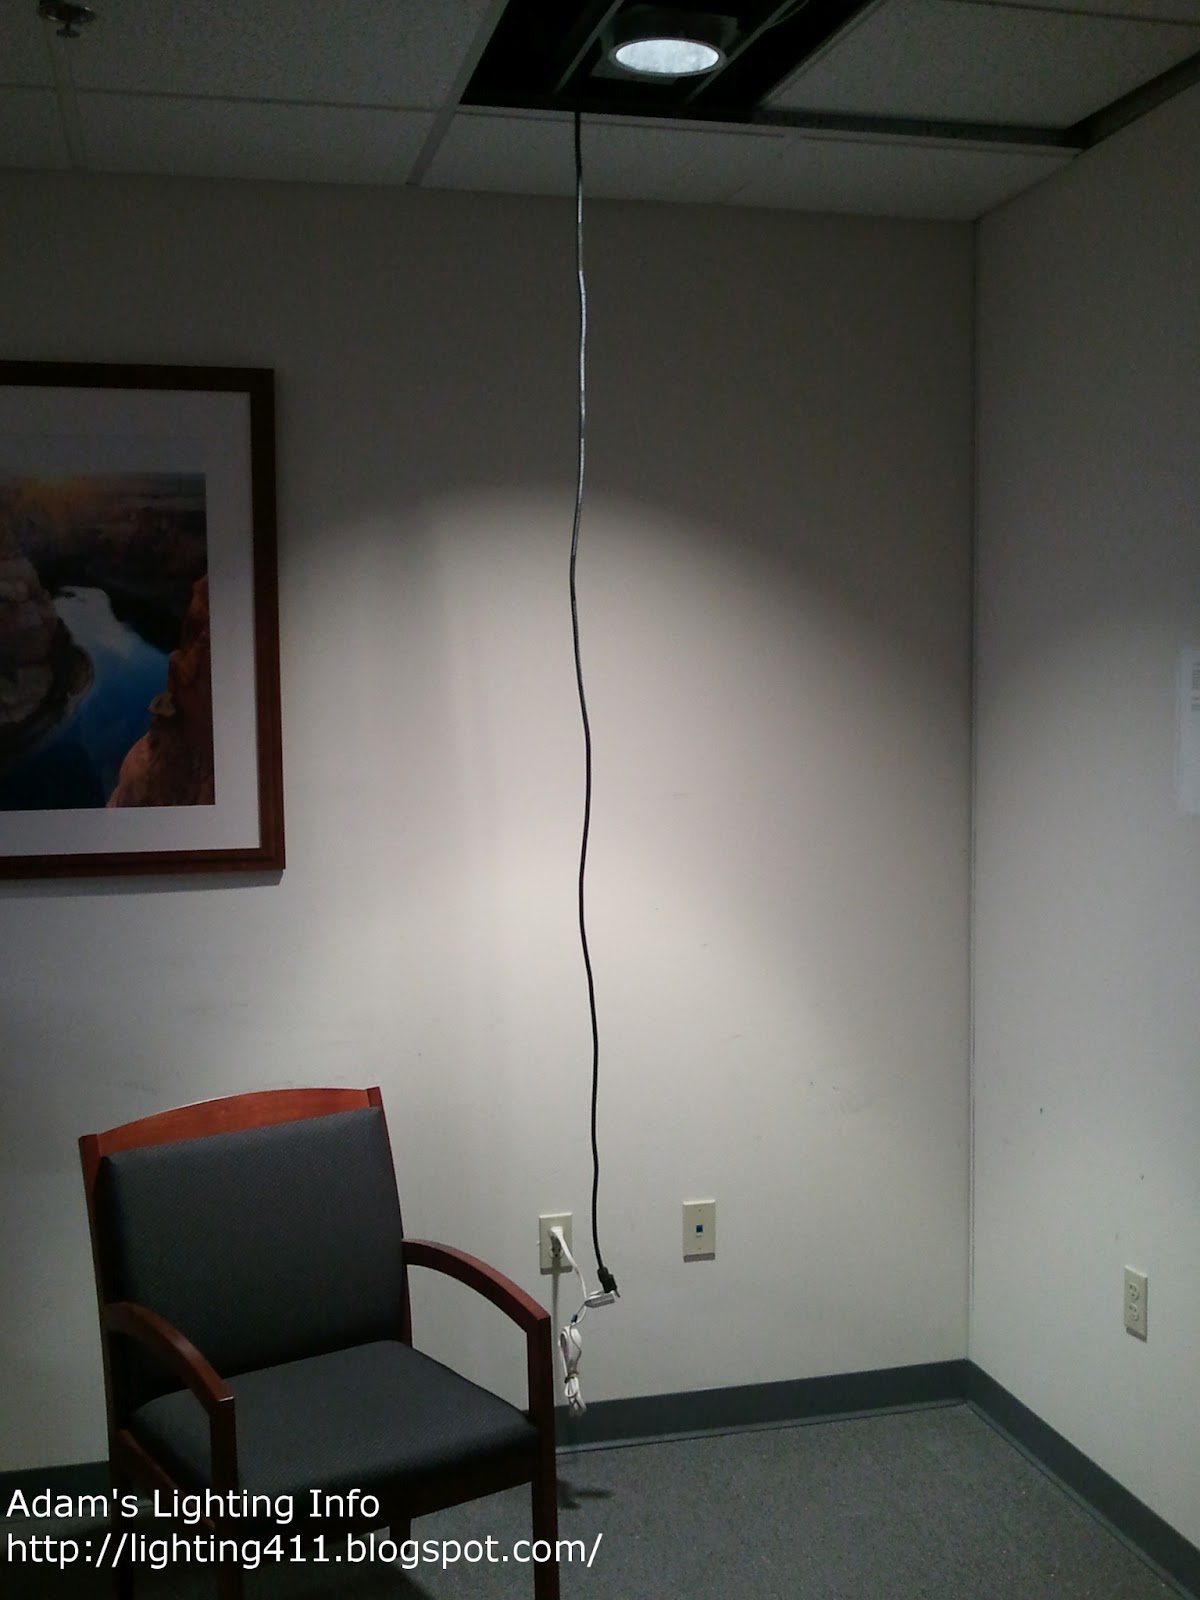
Below is a photo comparison between a 6 inch LED down light and a 4 inch LED wall washer mounted at 8.5 feet above the finished floor. In these photos you can see the difference between the cave effect the down light provides and the wash that the wall washer provides.
Please note that both are not permanently installed, and the wall washer is being affected by having its trim above the ceiling grid. As you can see in the second photo, the light is being interrupted by the grid which results in a shadow at the top of the wall.
Click the pictures to enlarge.
By using a combination of wall washers around the perimeter of the room, and down lights in the center, a room can be lit without odd scalloping on the walls. Some may argue that scalloping the wall with even spacing of fixtures can create a visual interest, it can also be argued that this is actually taking away from design elements in the room by the interior designer, architect, or end user.
One application that uses wall washers often is video conference rooms. Cameras can exaggerate lighting conditions to appear either under or over lit. By providing an evenly lit wall, the camera will not be confused as to which lighting level it should adjust its levels. Also the background for the subject will not be dark, creating a more natural look for the video call.
Below is a photo comparison between a 6 inch LED down light and a 4 inch LED wall washer mounted at 8.5 feet above the finished floor. In these photos you can see the difference between the cave effect the down light provides and the wash that the wall washer provides.
Please note that both are not permanently installed, and the wall washer is being affected by having its trim above the ceiling grid. As you can see in the second photo, the light is being interrupted by the grid which results in a shadow at the top of the wall.
Click the pictures to enlarge.
 |
| Down light, 30 inches from wall. |
 |
| Down Light, 8 inches from wall. |
 |
| Wall Washer, 30 inches from wall. |
 |
| Wall washer, 30 inches from wall. |
Thursday, June 26, 2014
Introduction
Hello and welcome to my lighting blog. I created this blog with the intent to help educate anyone who is either interested in, or perplexed by architectural lighting. There are a lot of little tips and tricks that I intend to share, many of which I use on a daily basis as a manufacturer representative. I know to some people, rep can be a four letter word, but my intention is not to sell you my lights, but rather just help you to make good lighting design choices whether you are using a manufacturer of mine or not.
If you are like me, you may be a visual learner. While I do tend to write lengthy descriptions when assisting customers with lighting applications, I find that the best tool is to send illustrations or pictures of what I am talking about. I intend to do the same on this site so you can actually see what I am talking about.
Once again, welcome to the site. I hope you find it informative.
Subscribe to:
Posts (Atom)